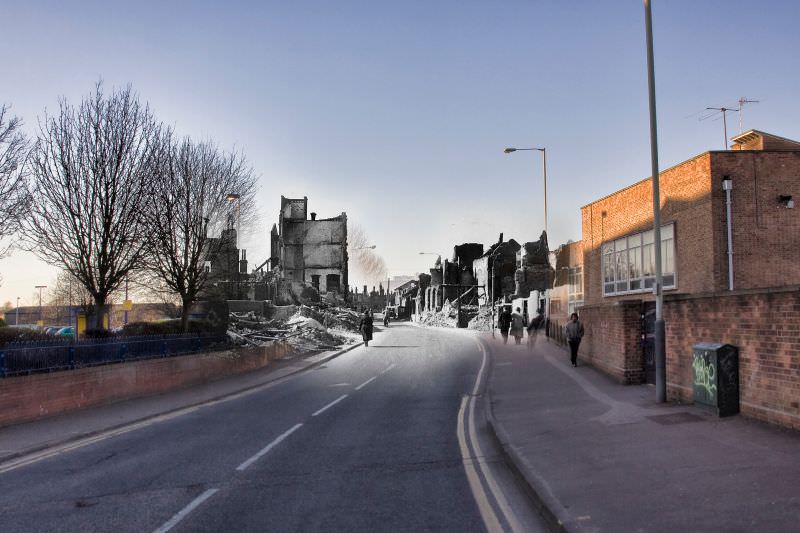

In the spring of 1942, German bombers turned their attention to Norwich as part of a calculated campaign known as the Baedeker Raids. Unlike earlier bombing campaigns targeting British industry and ports, these raids deliberately singled out cities with high cultural and historical value. Norwich, with its medieval streets, ancient churches, and listed landmarks, was a prime target.
The first wave hit on the evening of 27 April 1942 and burned through two full days. Further attacks followed in May. Then, on 26 and 27 June, a heavy bombardment struck again — this time damaging Norwich Cathedral. Norwich Castle, City Hall, and the Guildhall survived, but large sections of residential streets were reduced to rubble. Hundreds of homes were destroyed, and the city’s face was permanently altered.
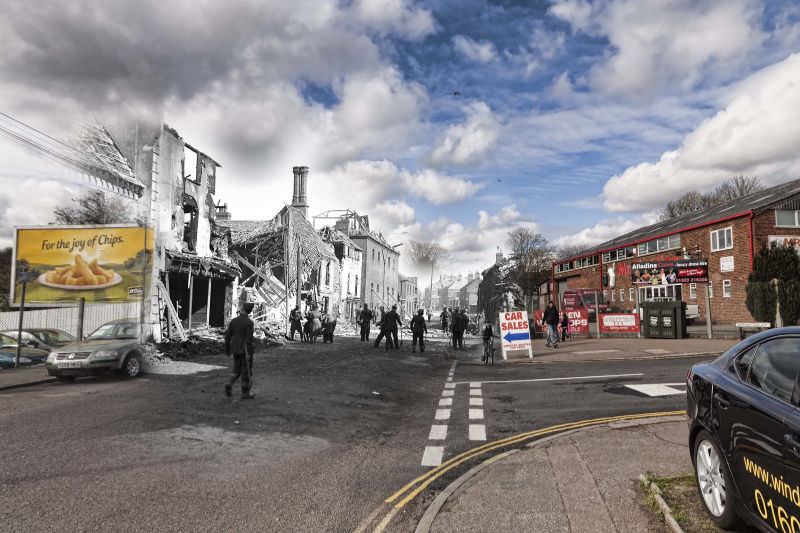
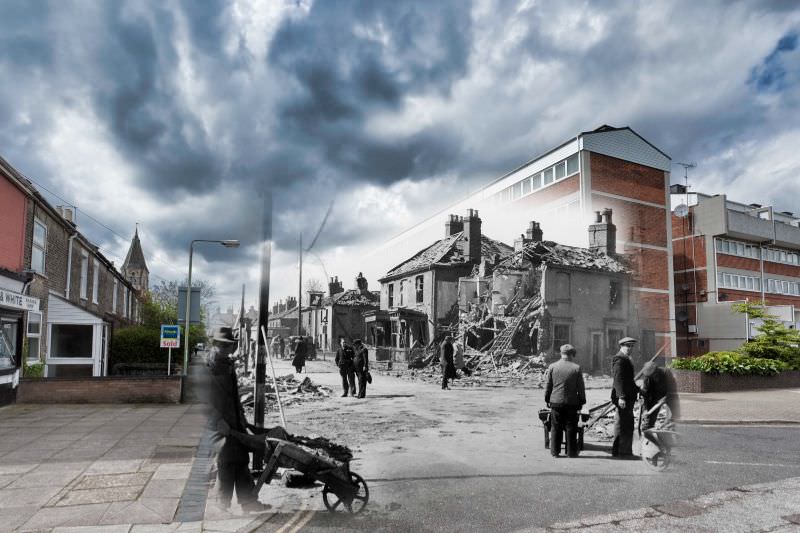
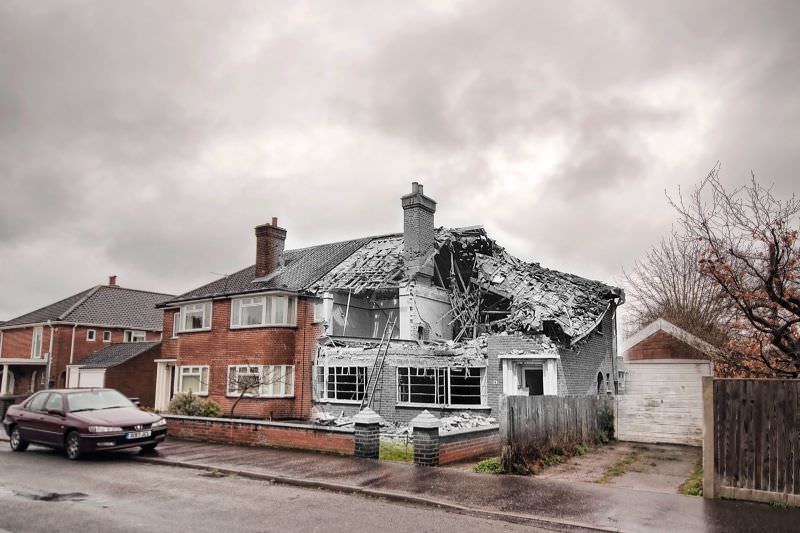
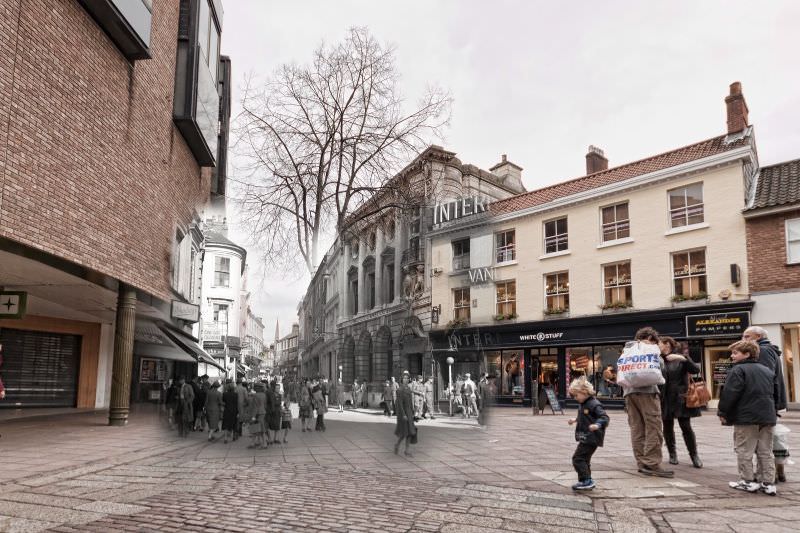
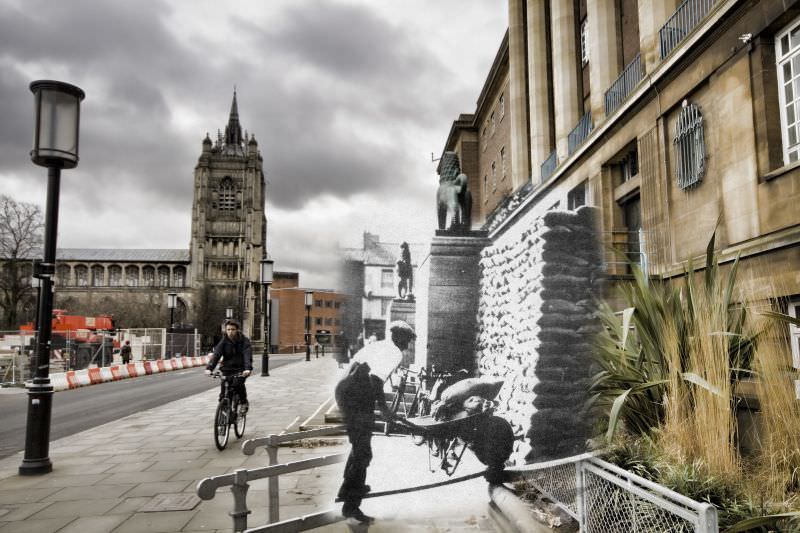
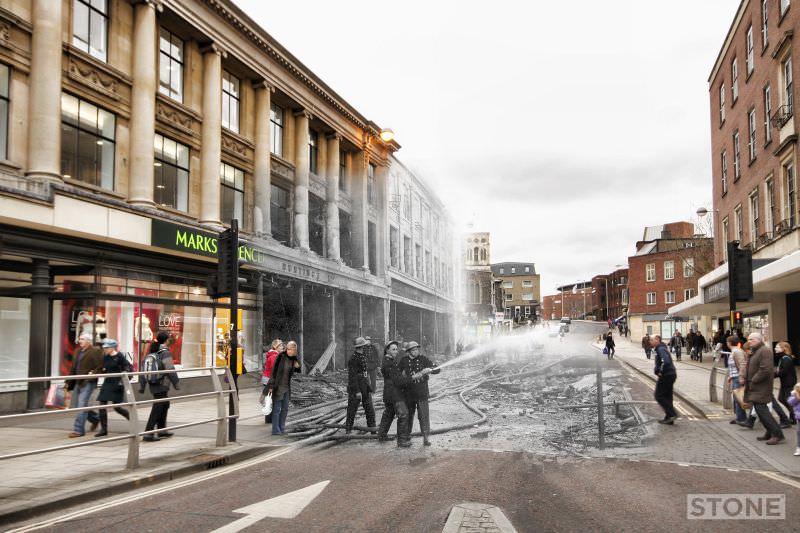
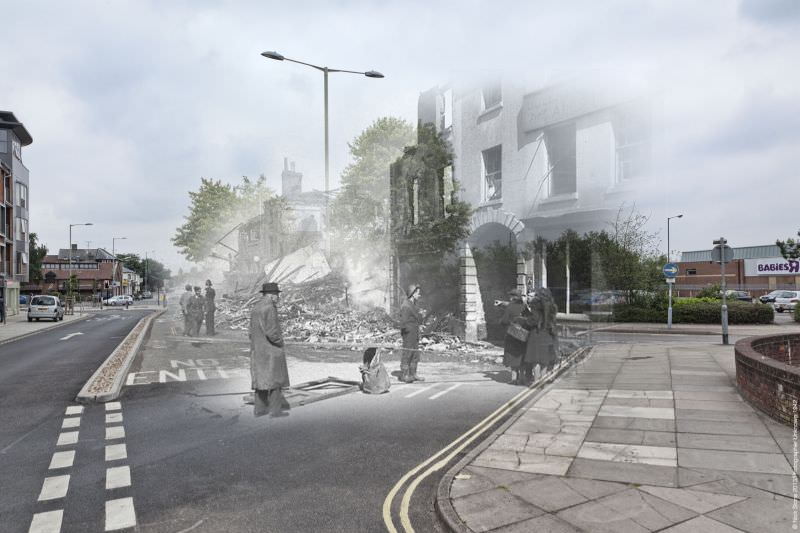
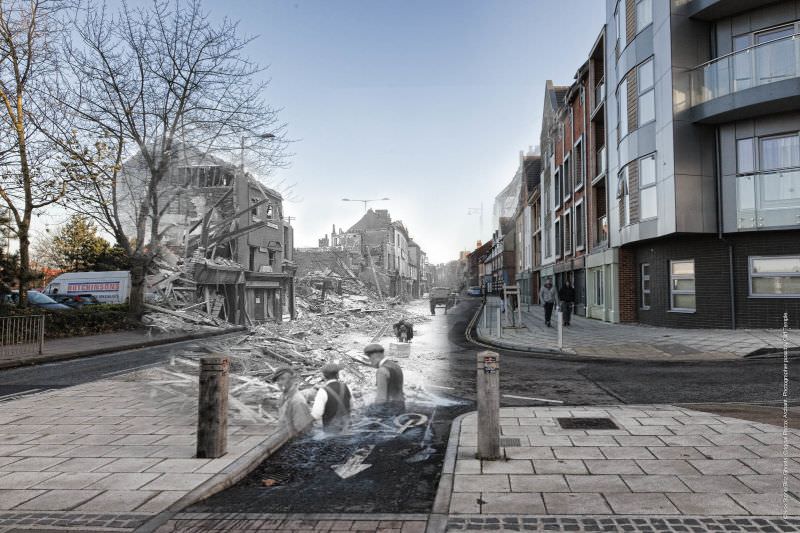
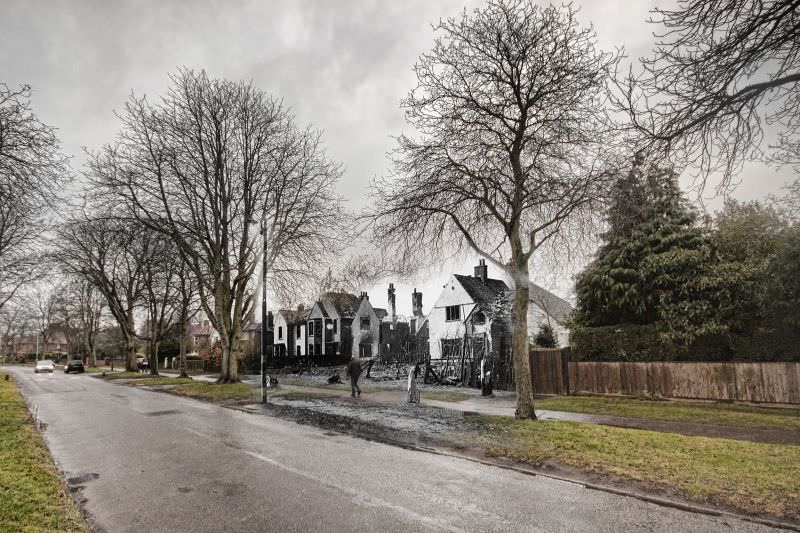
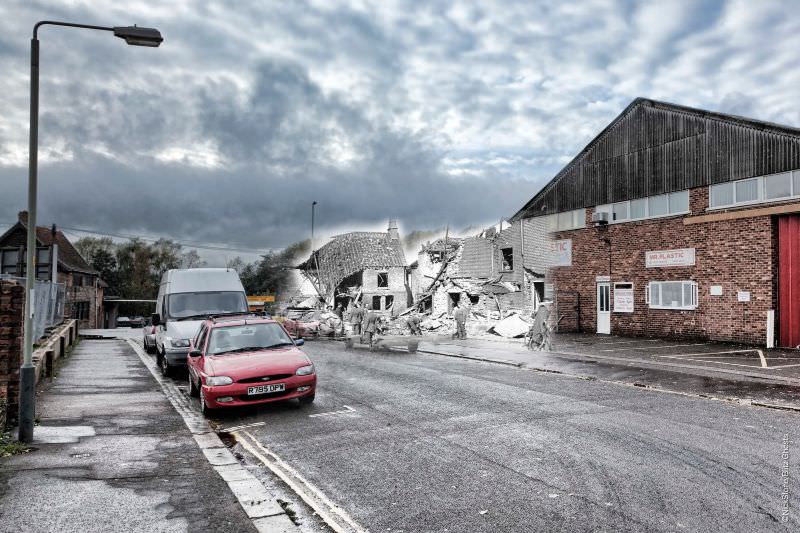
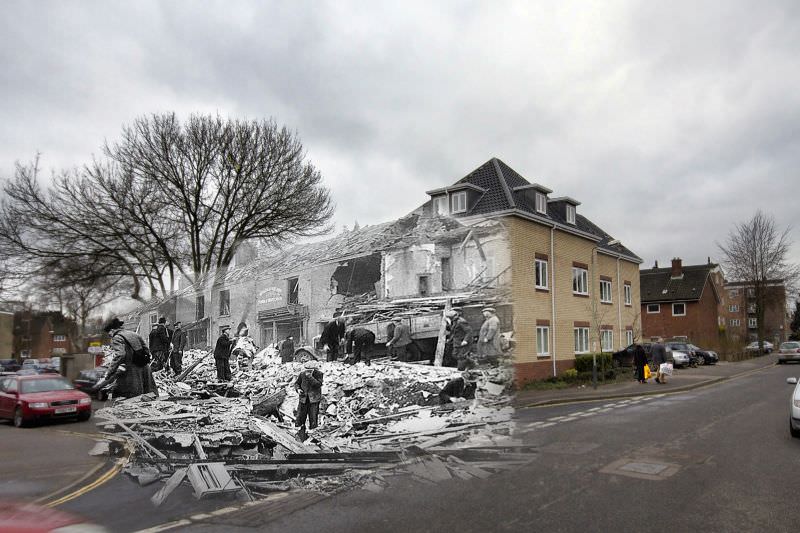
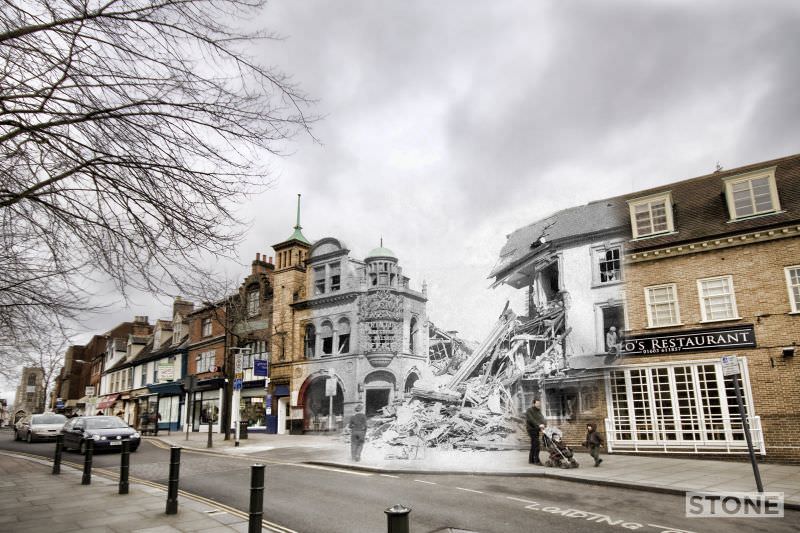
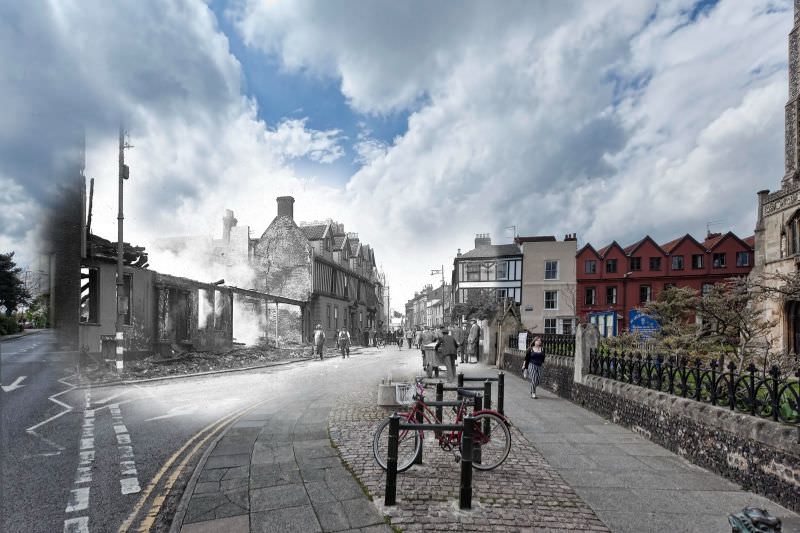
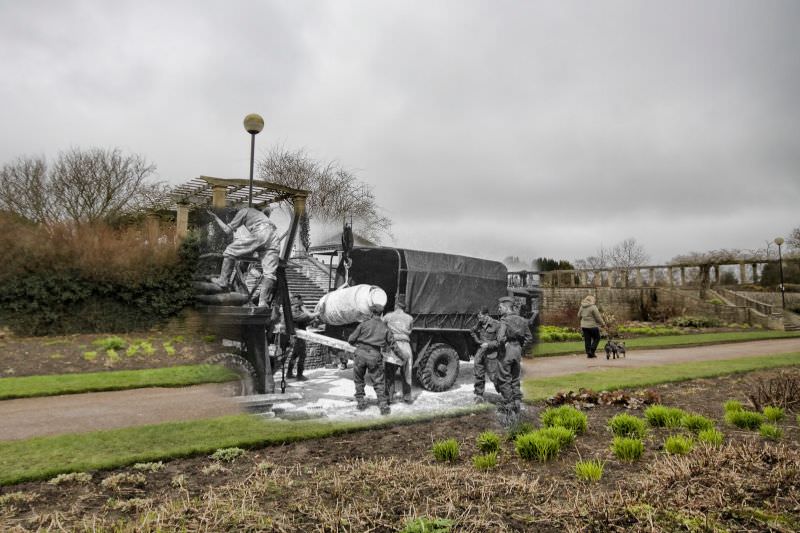
The then and now photographs collected here place wartime destruction directly alongside how those same spots look today. Each image is shot from the same angle, making it easy to see exactly what was lost and what replaced it. Streets that were once lined with rubble and blast damage now carry cars, shops, and ordinary daily life.
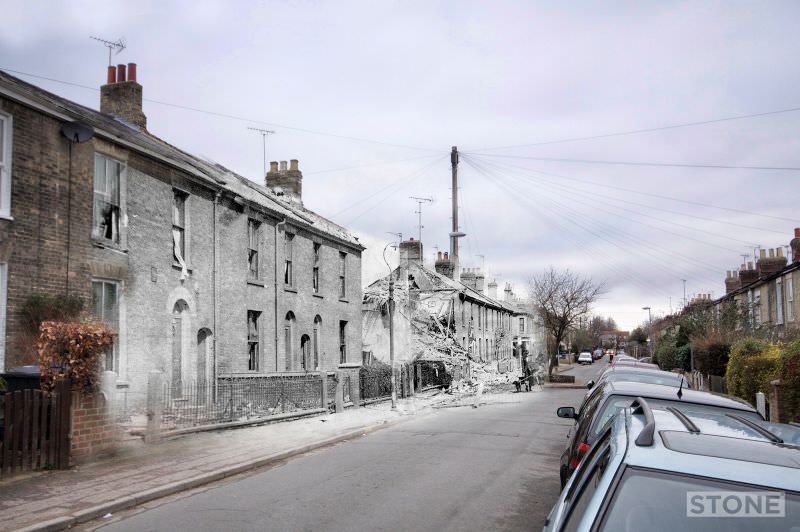
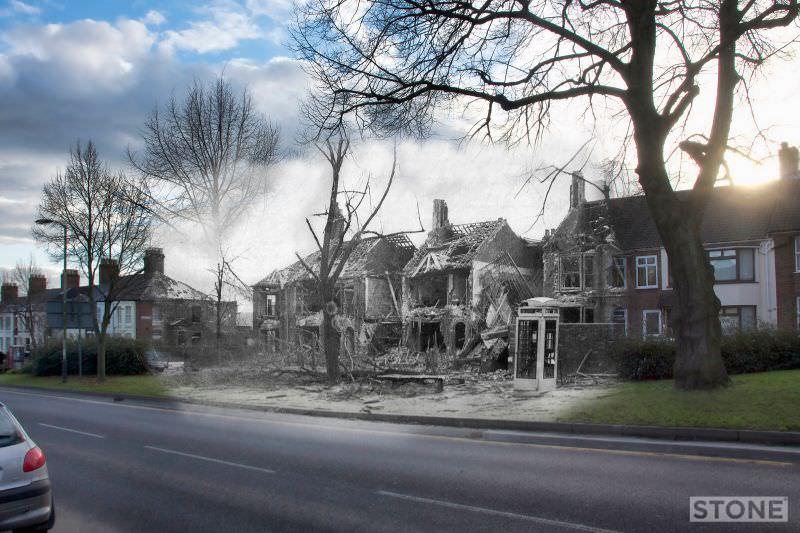
Residential roads across Norwich took some of the heaviest hits. Streets like Aylsham Road, Caernarvon Road, and Essex Street show rows of homes either gutted or completely flattened. The wartime photographs reveal the scale of civilian damage — these were not military installations but family neighborhoods.
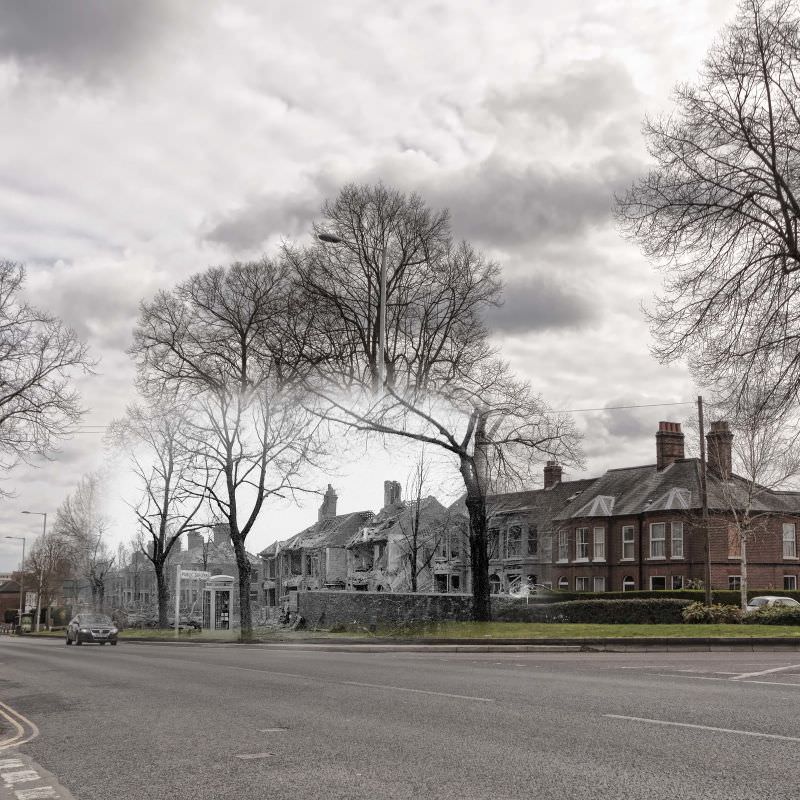
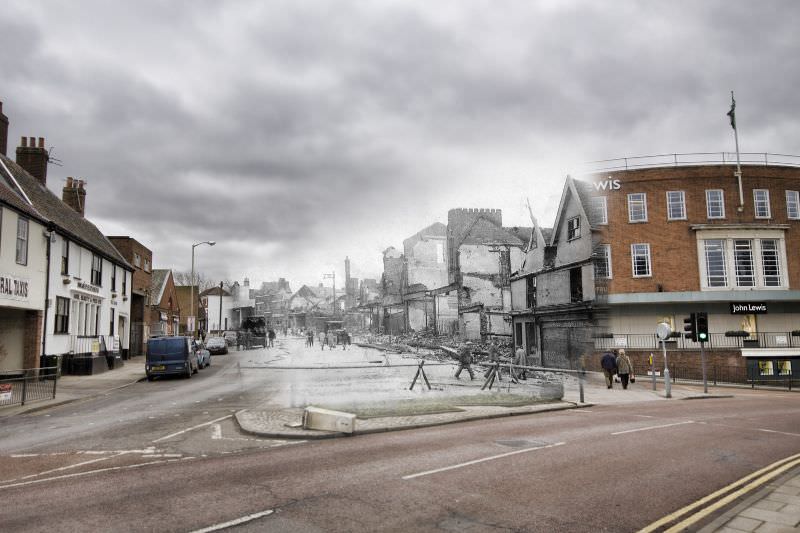
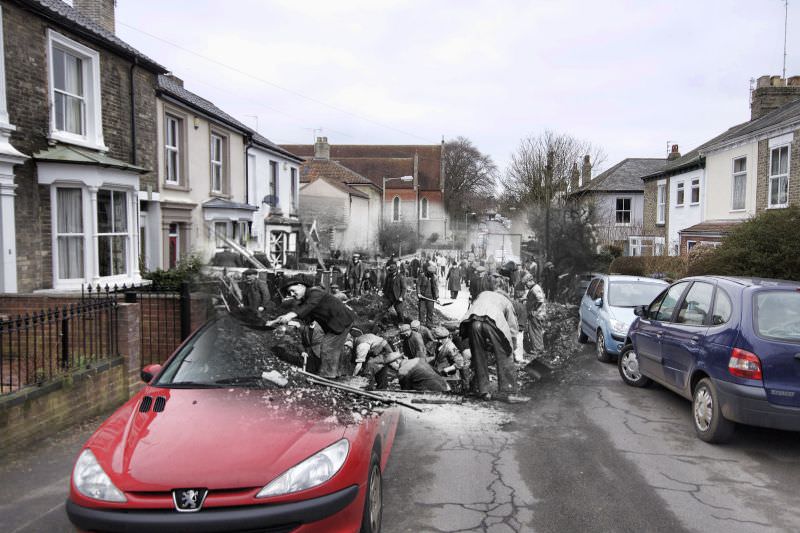
Outside the city center, areas like Catton also bore the scars of the raids. The corner of Church Street and Spixworth Road was photographed in 1945, showing damage that lingered well after the war’s most intense period. Recovery was slow in many parts of Norwich, and rebuilding stretched well into the postwar years.
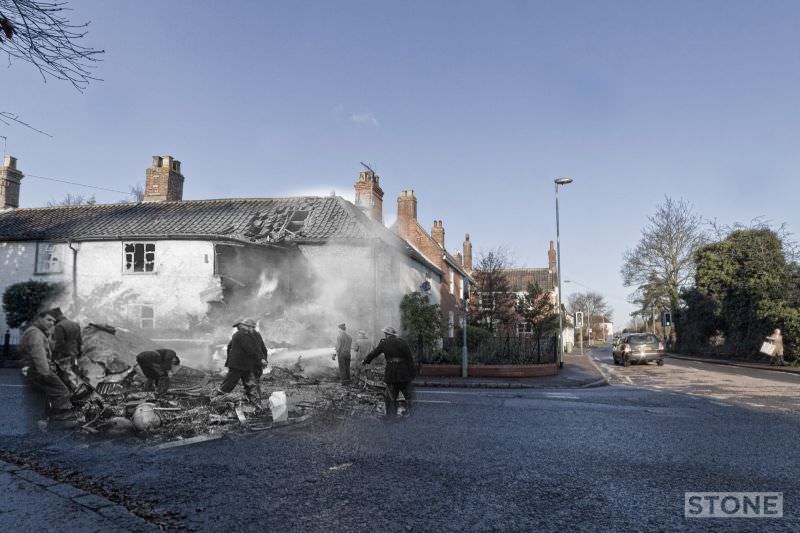
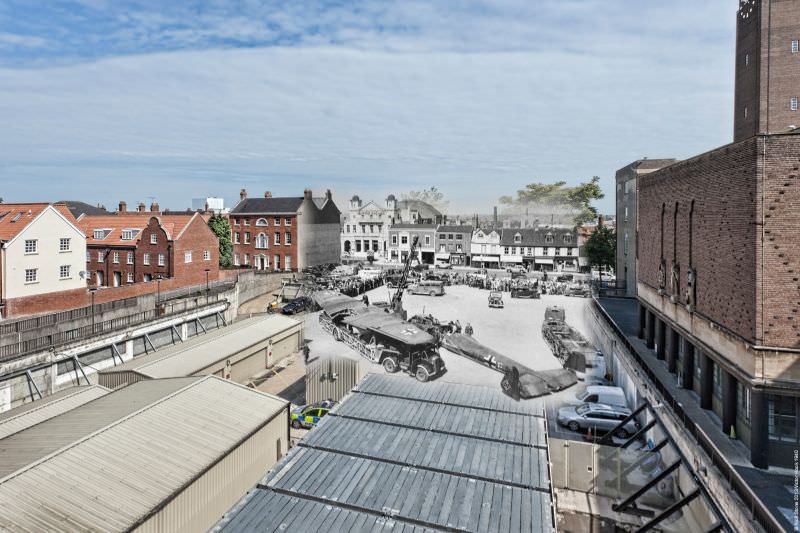
Commercial and industrial parts of the city were not spared either. Harmers Factory on St Andrews Broad Street was captured in 1943, its structure blackened and broken. London Street and Rampant Horse Street — both central shopping areas — show the contrast between wartime wreckage and the rebuilt pedestrian zones that stand there now.
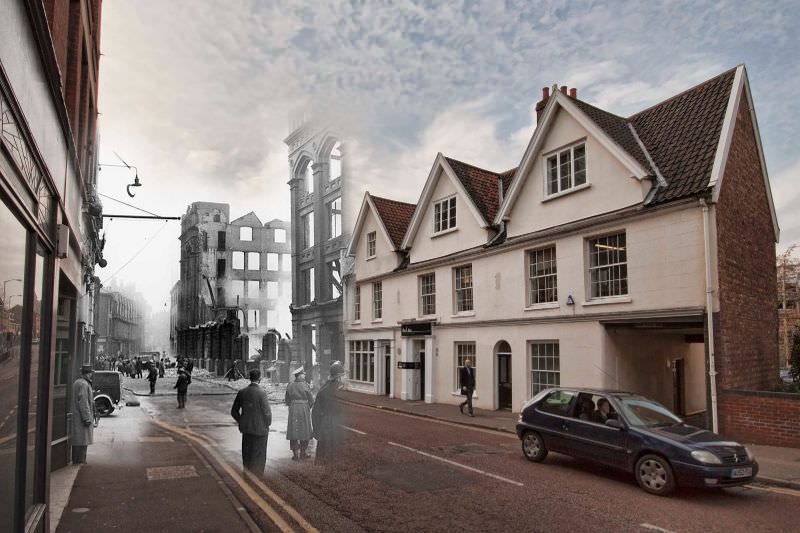
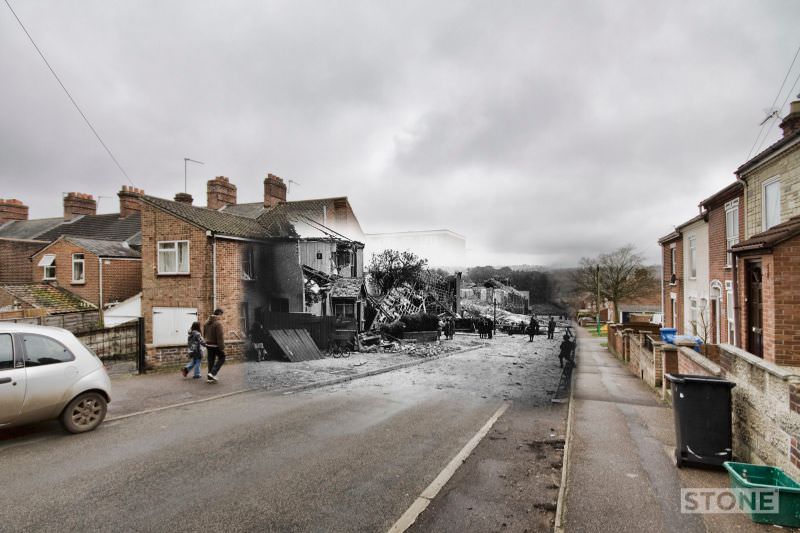
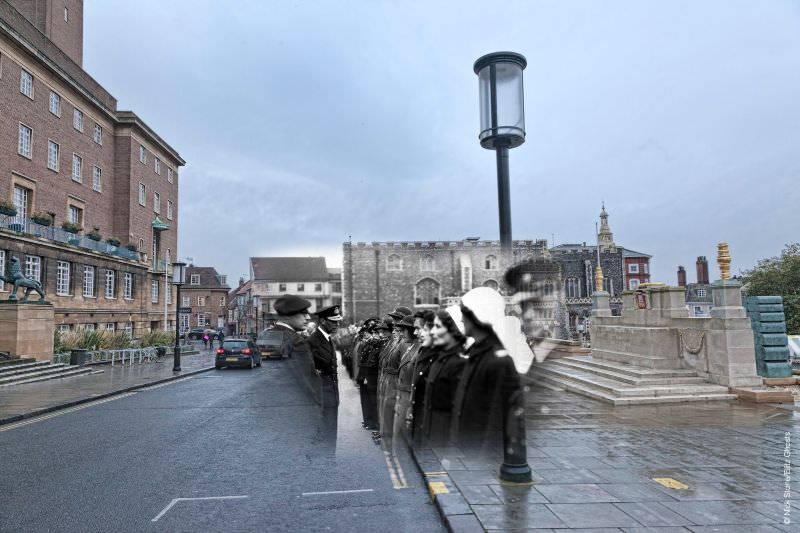
King George VI visited Norwich in 1942, a moment captured in one of these paired photographs. His visit acknowledged the severity of what the city had endured. The modern image taken from the same location shows just how thoroughly the surroundings have been transformed in the decades since.
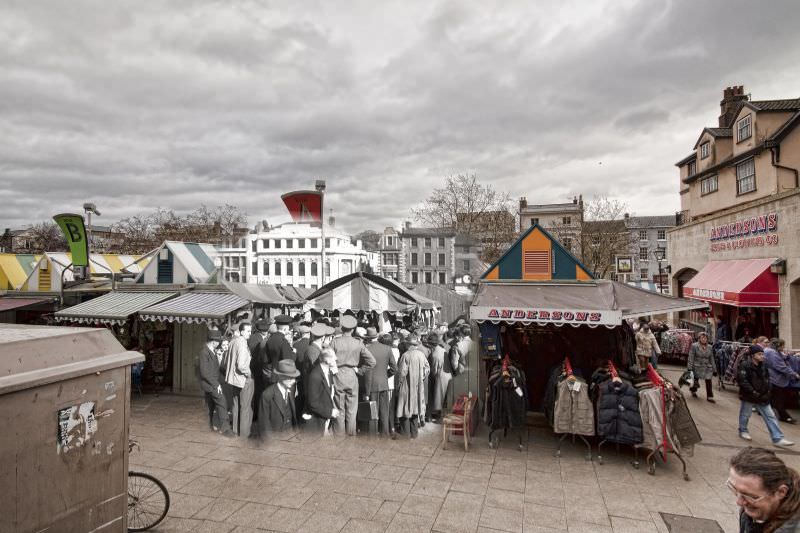
Norwich City Hall, one of the landmarks that escaped destruction, appears in a 1940 photograph that shows the broader civic center largely intact. The market beside it also survived, though its surroundings did not always fare as well. These survivals were notable given the scale of destruction elsewhere in the city.
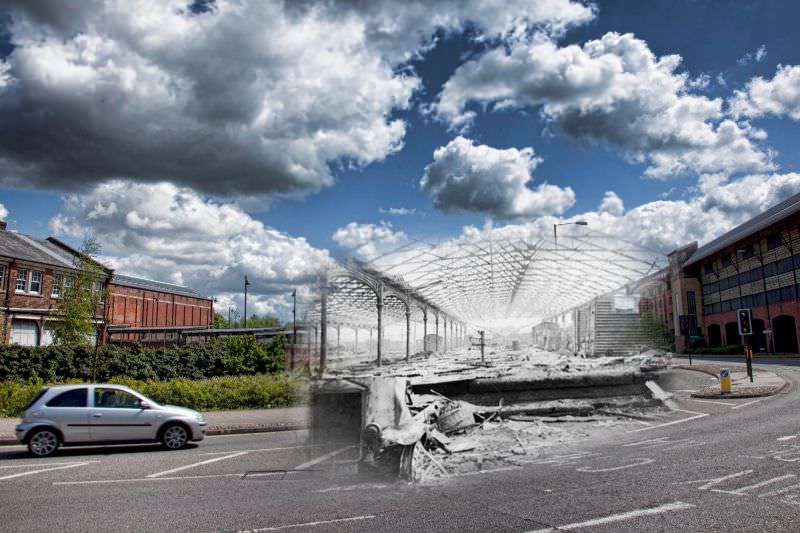
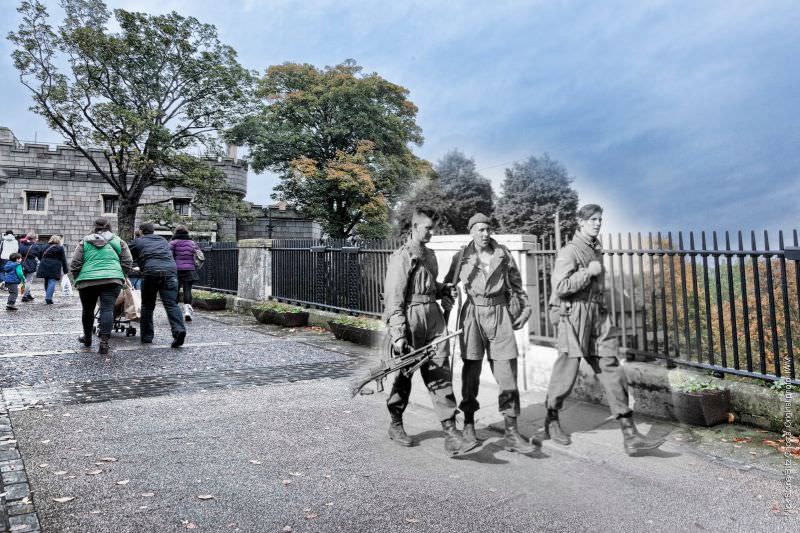
Norwich Thorpe Station was an important wartime landmark, moving troops and supplies throughout the conflict. Parachute soldiers were also a visible presence in the city during this period, conducting exercises under Eastern Command while the wider war effort continued around them.
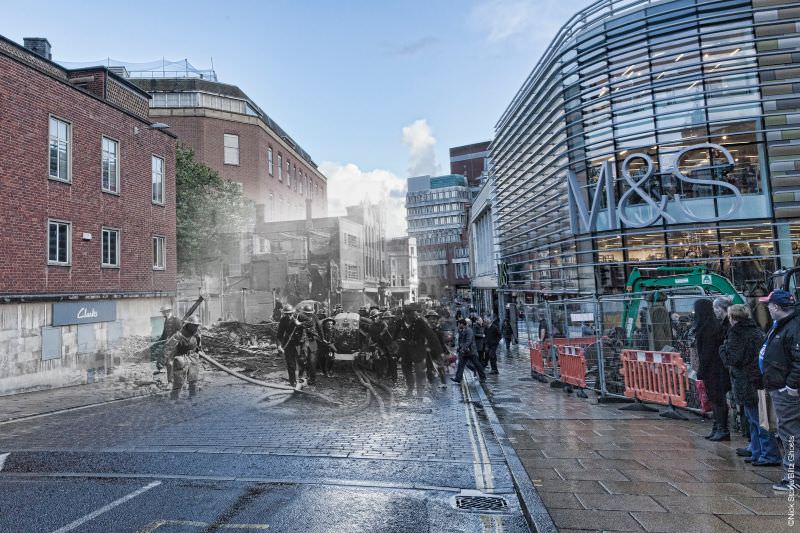
The St Augustines area of Norwich saw considerable bomb damage. The gate, the school, and the surrounding streets all feature in these comparisons. St Augustines Gate in the 1942 photograph shows a city still raw from attack, while the 2014 image reveals a quieter, rebuilt streetscape.
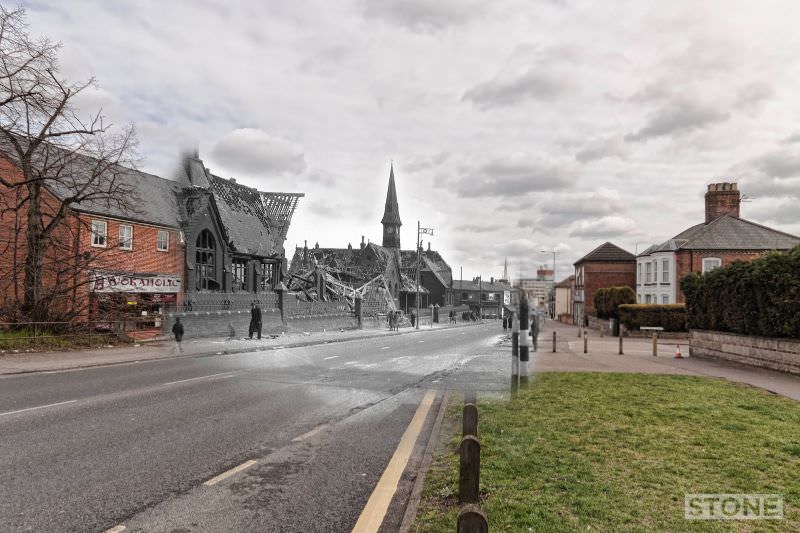
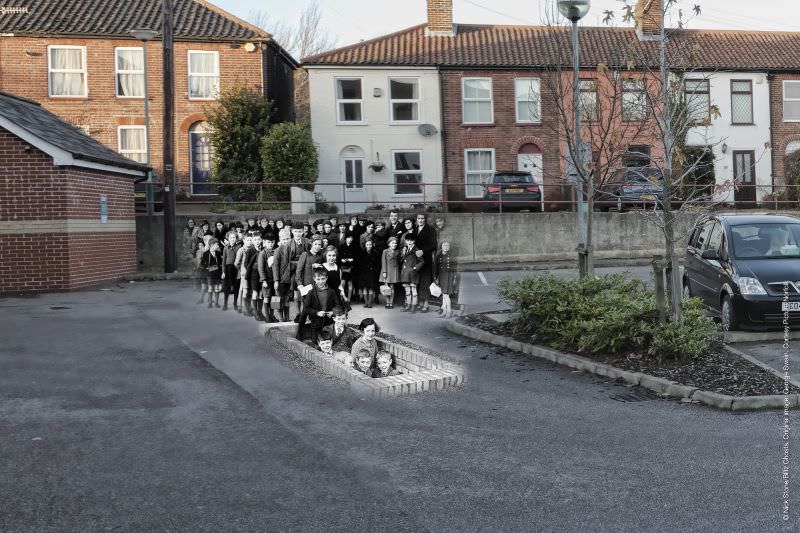
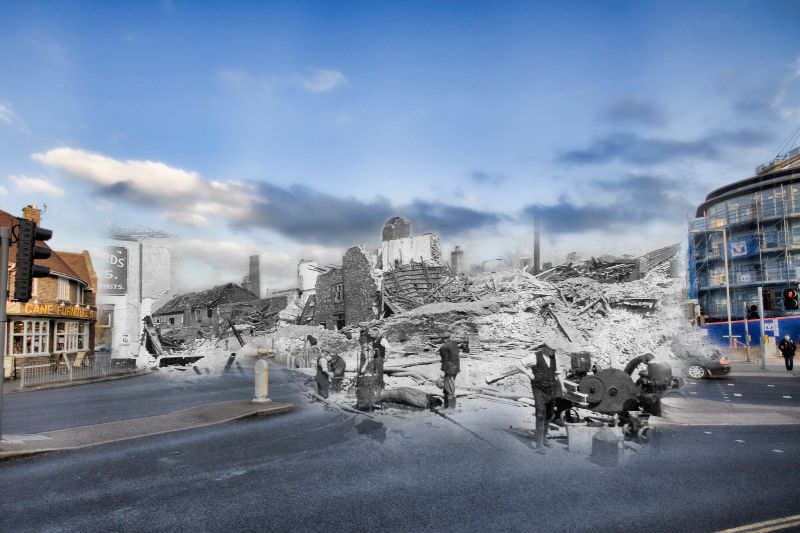
St Benedicts Street appears in multiple photographs, each taken at a slightly different point along its length. The wartime images show damaged facades and cleared debris. The modern equivalents reveal a street that rebuilt itself, though the architecture tells a story of what was patched together in the postwar decades.
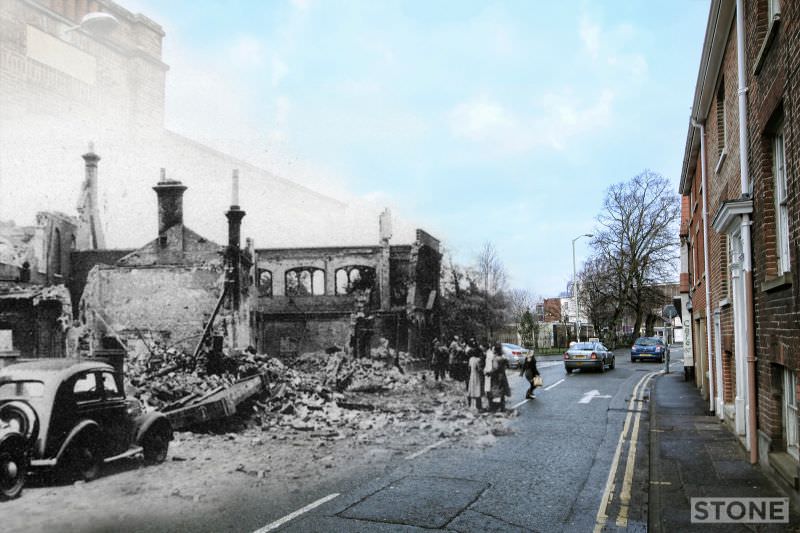
Religious buildings across Norwich were caught up in the destruction. St Mary’s Baptist Chapel on Duke Street stands in both the wartime and modern frames, a rare example of continuity. Other sites were not so fortunate — the raids left a number of Norwich’s older ecclesiastical buildings either damaged or completely lost.
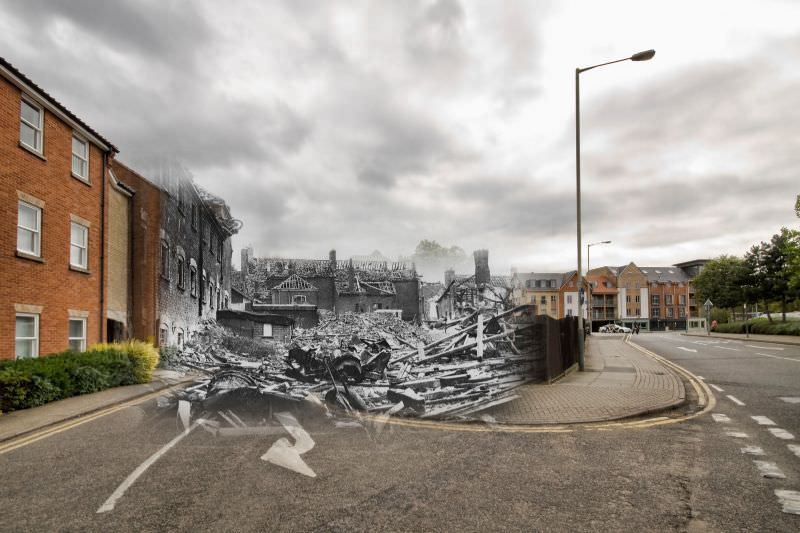
Pub buildings like the Vauxhall Tavern on Vauxhall Street also feature in these records. Captured in 1941, the building represents the kind of ordinary neighborhood fixture that the raids threatened throughout the city. Waterloo Park and Waterloo Road round out the collection, showing how even open green spaces and thoroughfares were marked by the conflict.
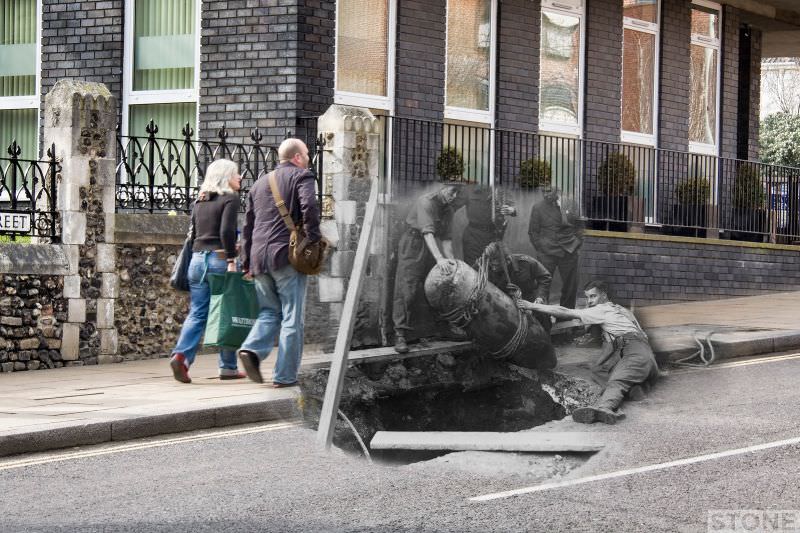
One of the most striking single images in the collection shows an unexploded bomb — a UXB — on Theatre Street in 1942. Bomb disposal teams faced these situations across Norwich throughout the raids, working to defuse devices that had landed without detonating. The modern photograph of Theatre Street shows no trace of that danger.
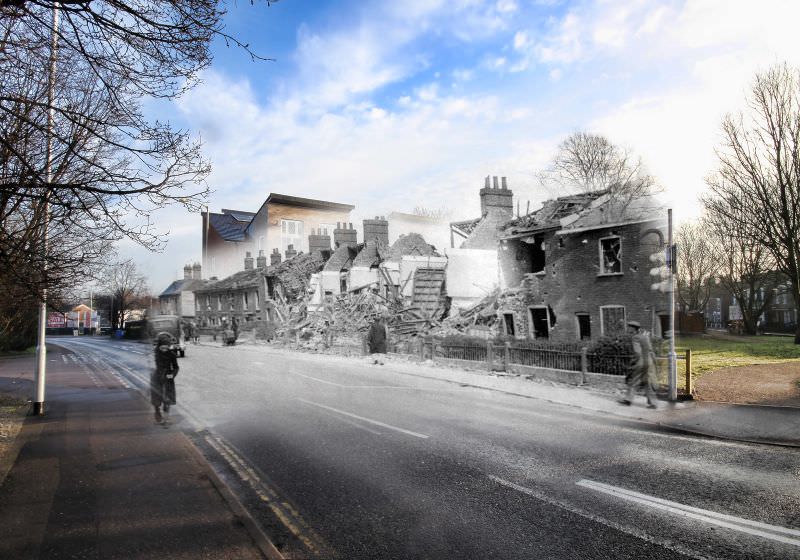
The final comparison — Westwick Street and Barn Road — closes out a collection that spans dozens of Norwich locations. Taken together, these photographs document a city that absorbed enormous punishment during two months of targeted bombing in 1942, and then rebuilt itself street by street over the decades that followed.